Inbox Sensor module is a part of Responder Tool. This article explains how to configure an Inbox sensor for your Facebook page(s) inbox.
Inbox Sensor Features
- Auto respond to incoming messages.
- Create rules to respond with a specific message, based on incoming message content.
- Enable or disable No-Spam feature, to avoid spamming your fans.
- Autopilot.
- Conversation tags. Tagging conversations can be useful for Re-Targeting, Tagged conversations can be managed through Conversation Manager tool in FoxMaster Suite.
- Enable / Disable individual sensor features.
Enabling Inbox Sensor
- Open Responder tool and click Preferences from top menu
- Select an Facebook account from left table to and click Refresh button to display linked pages.
- Select accounts that you would like to enable inbox sensor for.
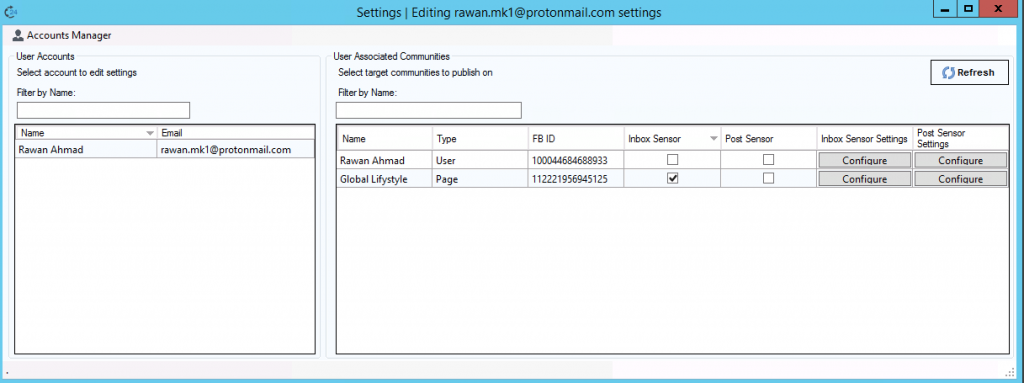
4. Click Configure in “Inbox Sensor Settings” Column to open Inbox Sensor settings form.
Configuring Inbox Sensor Rules
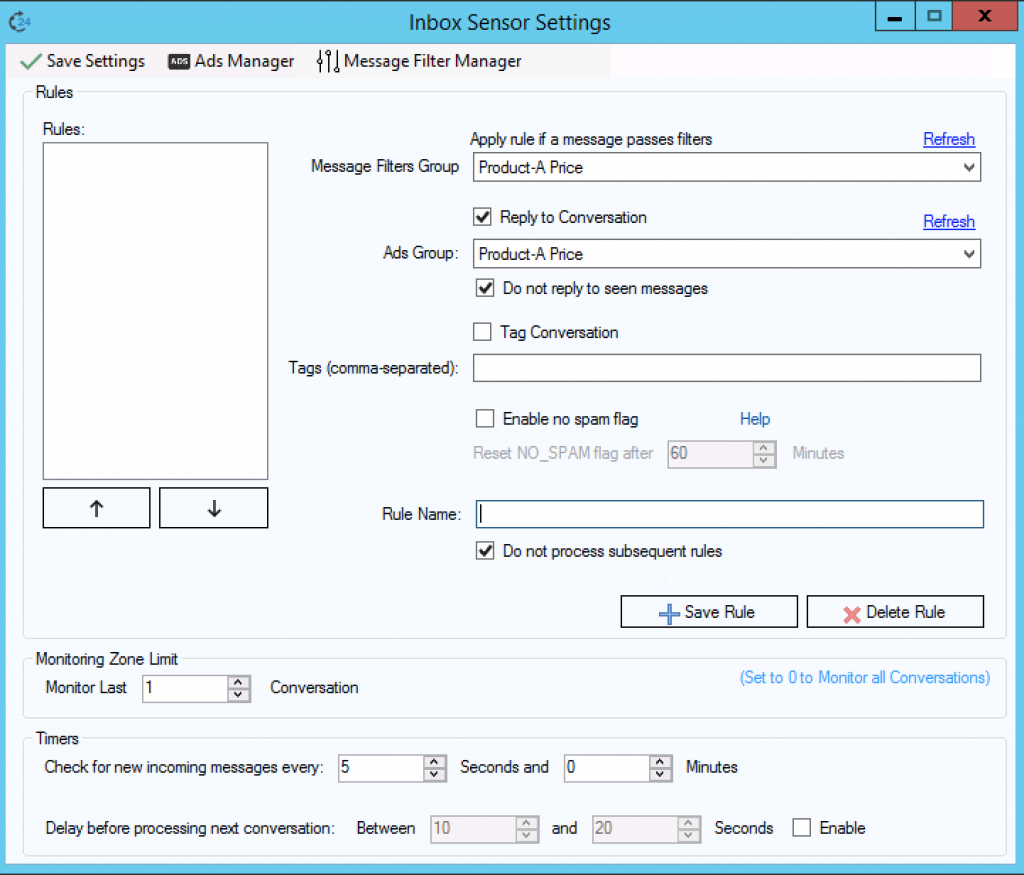
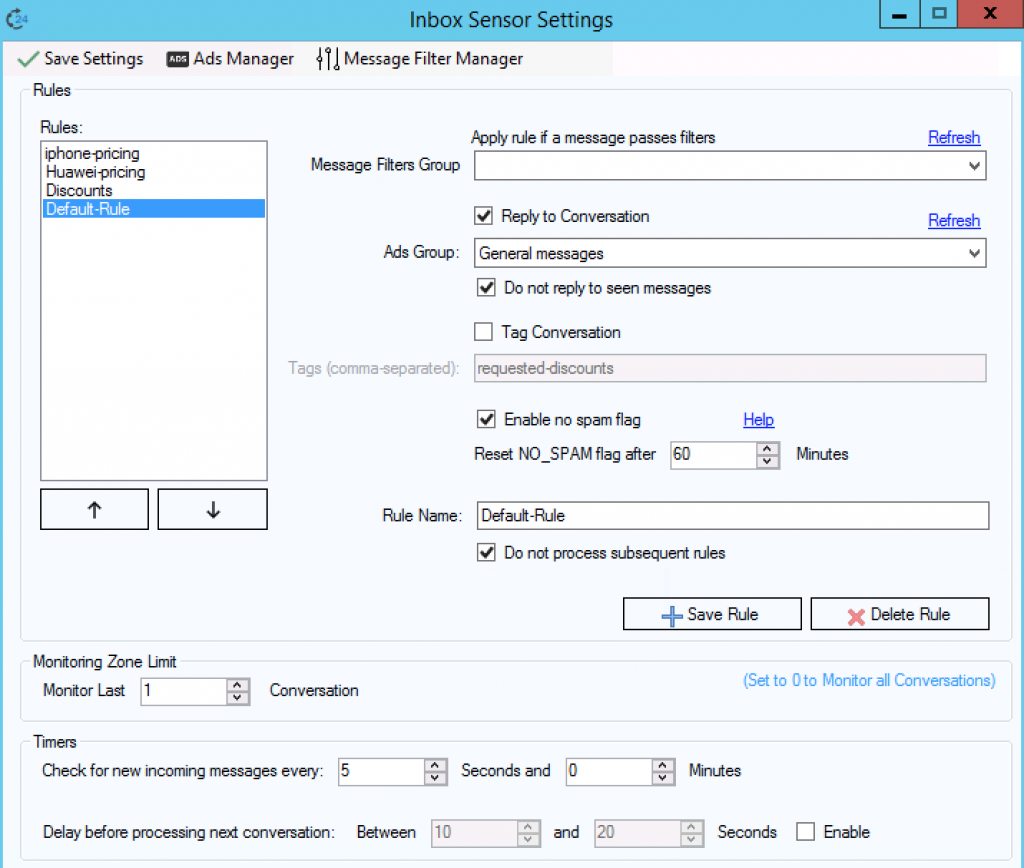
The settings consists of two main parts, Rules and Global settings. Rules are applied to an individual message, where global settings apply to sensor general settings. You can set up multiple rules and each rule will be applied on order.
Let’s take this scenario as an example and create rules to make inbox sensor more smarter by responding to customers questions.
You’re selling a mobile phones through your Facebook business page, and you receives a lot of message that asks about iPhone and Huawei phones pricing, also people are asking if you have a discounts, other questions are generic questions.
Bolded text is our key to create the rules, we will need to create 4 rules, 2 rules for answering questions related to iPhone and Huawei pricing, 1 rule for answering questions related to discounts, and a final rule for answering any generic question.
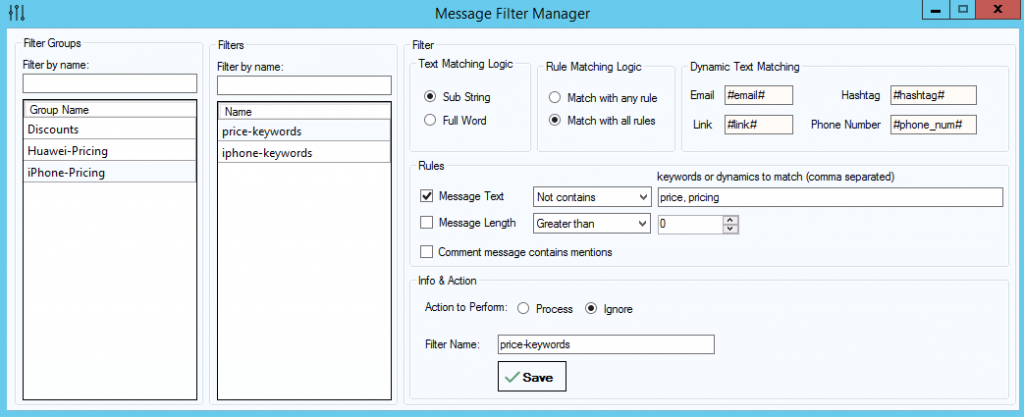
In order for the sensor to determine if the messages asks about something, we will need to create a filters in “Message Filter Manager” tool, if message passes through the selected filters, then the sensor will know that the message contains a specific keywords and respond with desired answer.
The filters could be looks like this:
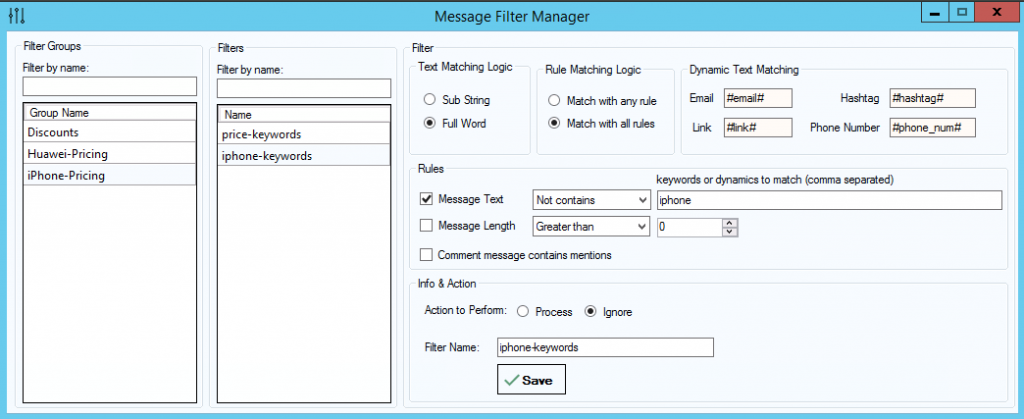
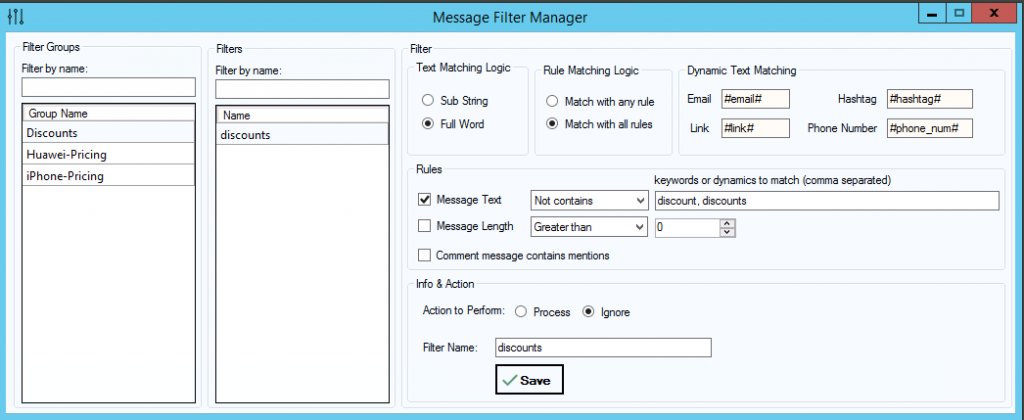
After creating message filters, close Message Filter Manager tool and return to Inbox Settings. Click refresh from top right corner of Message Filter Groups to display created filters groups.
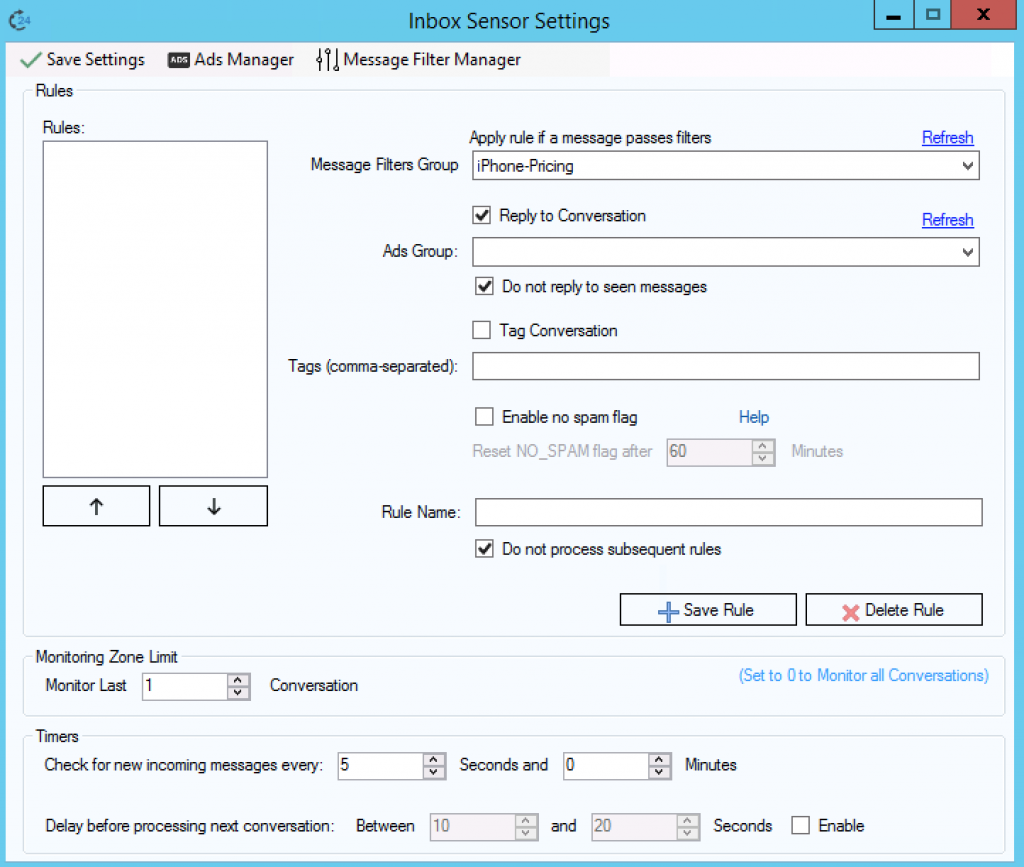
If a message passes through the selected filters group “iPhone-Pricing” then tell the sensor to respond with pricing list by selecting an Ads Group. This article shows How to create a message template.
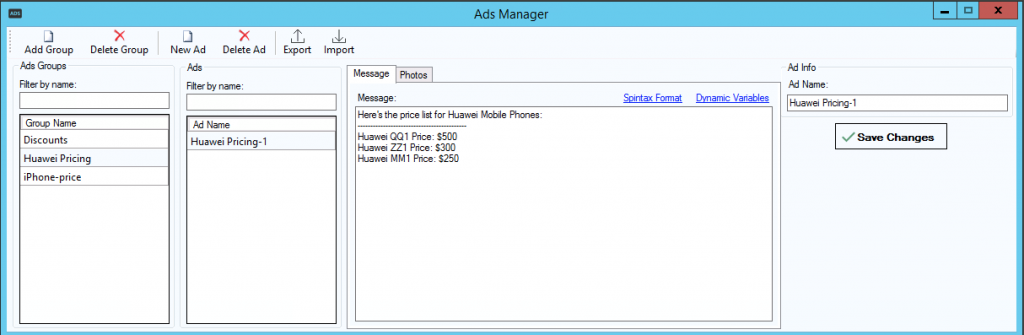
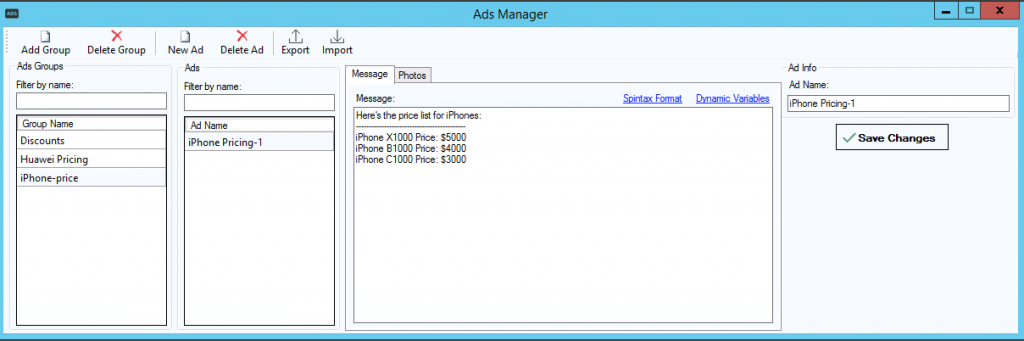
The ads messages could be looks as shown in the following images, when there’re more than one message in an ads group, the sensor will pick a random message from selected group each time it reply to a message.
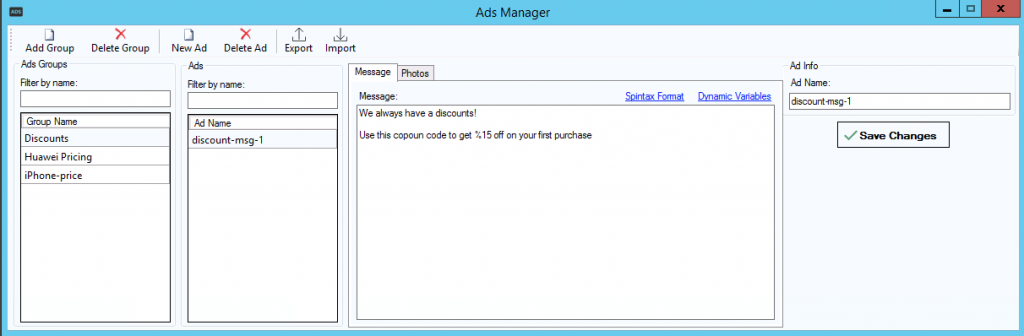
After creating a message template click Refresh from top corner to re-display created ads groups.
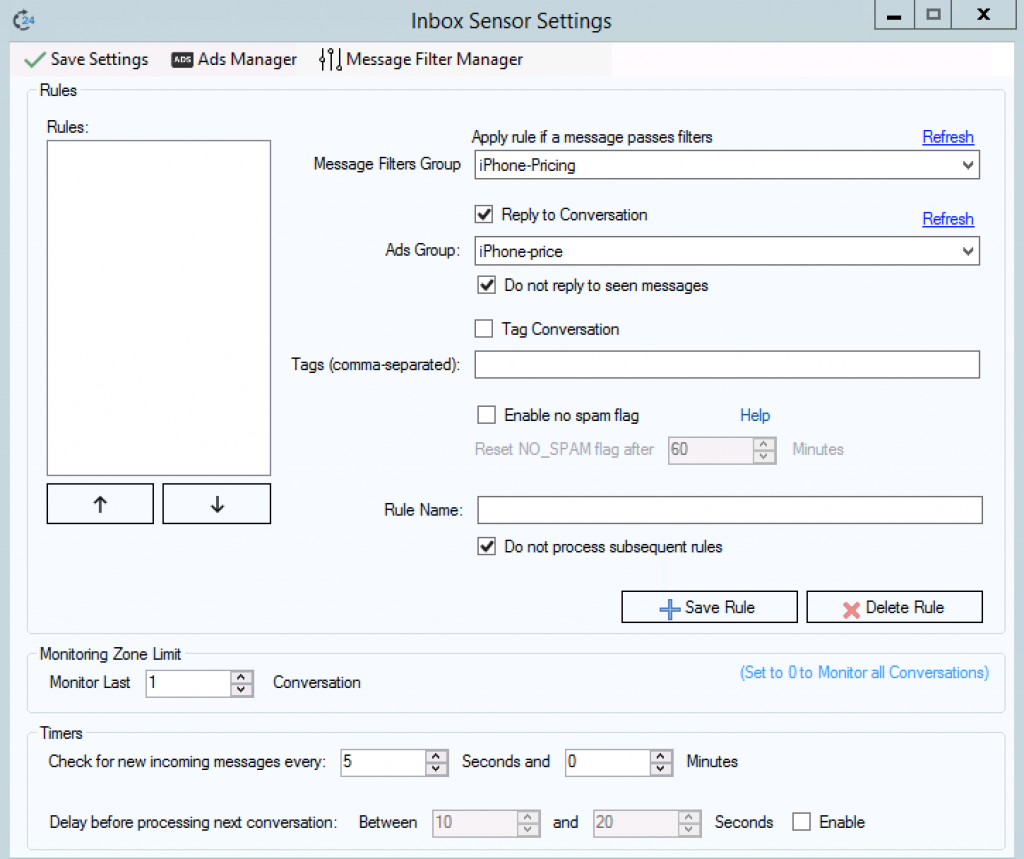
The option “Do not reply to seen messages” can be enabled to avoid replying to messages has been seen by a moderator, Can be useful to avoid conflict when chatting directly with a customer.
The option “Tag Conversation” can be enabled to tag the conversation, tagged conversations can be managed through Conversation Manager tool in FoxMaster Suite.
The option “Enable no spam flag” can be enabled to avoid spamming a customer by responding too many message. Example; a customer sends messages repeatedly and the sensor responding to these messages. When this option is enabled, the sensor will respond only once every X minutes.
The option “Do not process subsequent rules” tells the sensor to not process the remaining rules if the current rule matches with the message. The default is “enabled”.
Enter a name for the rule and click Save Rule. The rule for iPhone pricing can be looks like this:
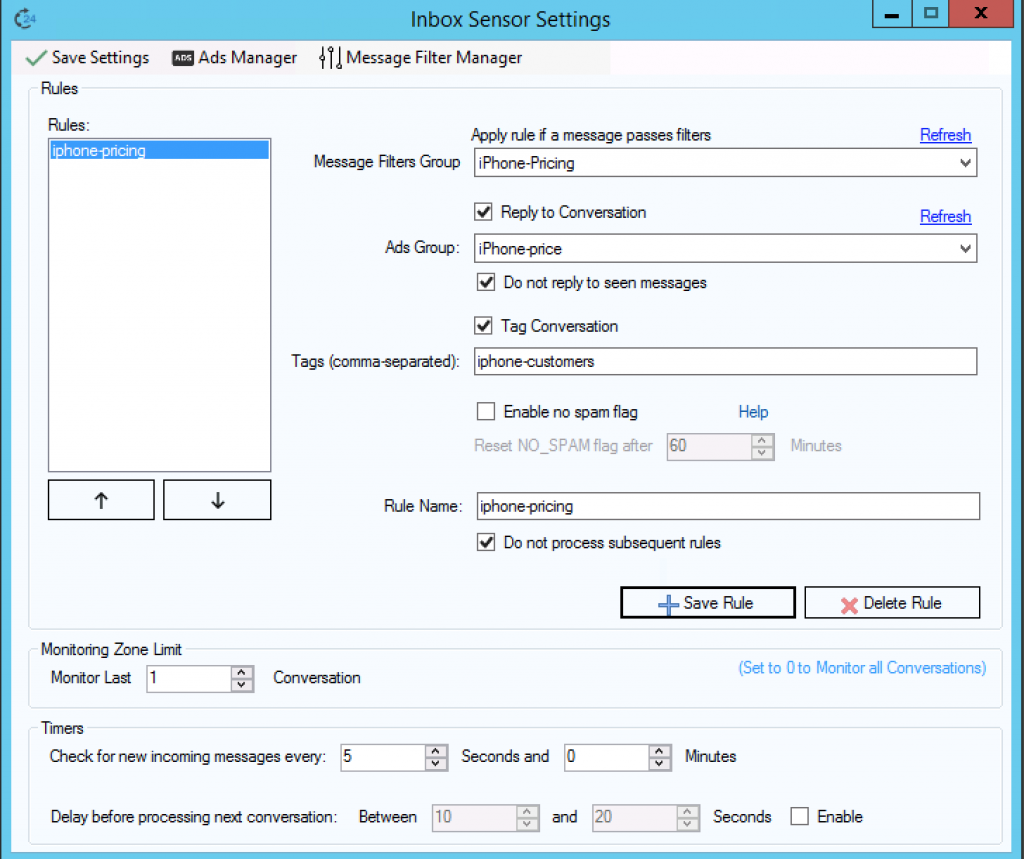
The rule shown in the picture above, tells the sensor the following:
- Check if message passes the filters “iPhone-Pricing”
- Do not reply to message if it’s marked as seen.
- If message passes through the filters then, reply with a message from ads group “iPhone-price”
- Tag the conversation with the tag “iphone-customers”
If a message failed to pass through selected filters in rule settings, the sensor will move to next rule in order and try to find a match.
Creating rules for Huawei pricing, and discounts are the same, it should looks like this:
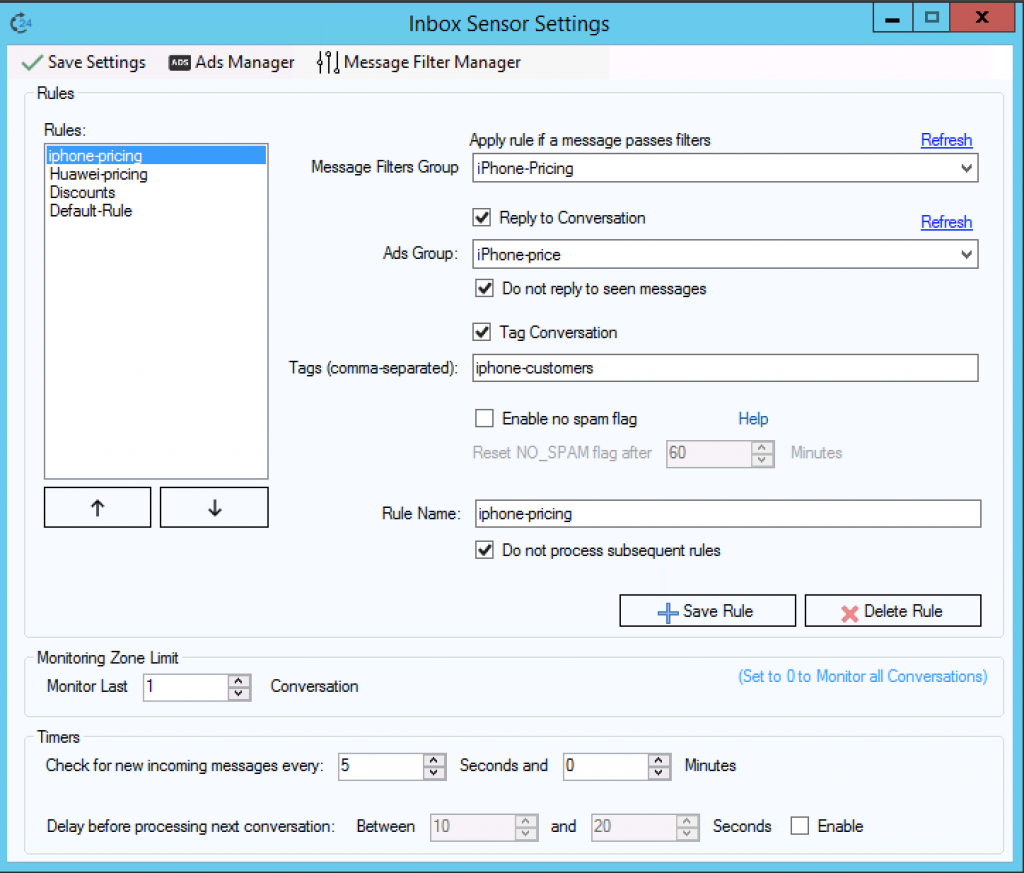
As you can see in the image, there’s 4 rules, The sensor will try first to apply the rule “iPhone-pricing” if no match, then will continue to next rule “Huawei-pricing”. You can adjust rules order by pressing Up and Down arrows in Rules list section.
It’s important to place the default rule at the end of rules list, it’s because default rules has no message filters, and because no filters is selected the sensor will just respond with a generic message ignoring other rules defined.
Global Settings
Monitoring Zone: In this settings section you can tell the sensor how many to monitor. The default value is monitoring last 1 conversation.
Timers: From this section, you can define the interval for checking for new messages. The default value is 5 seconds.
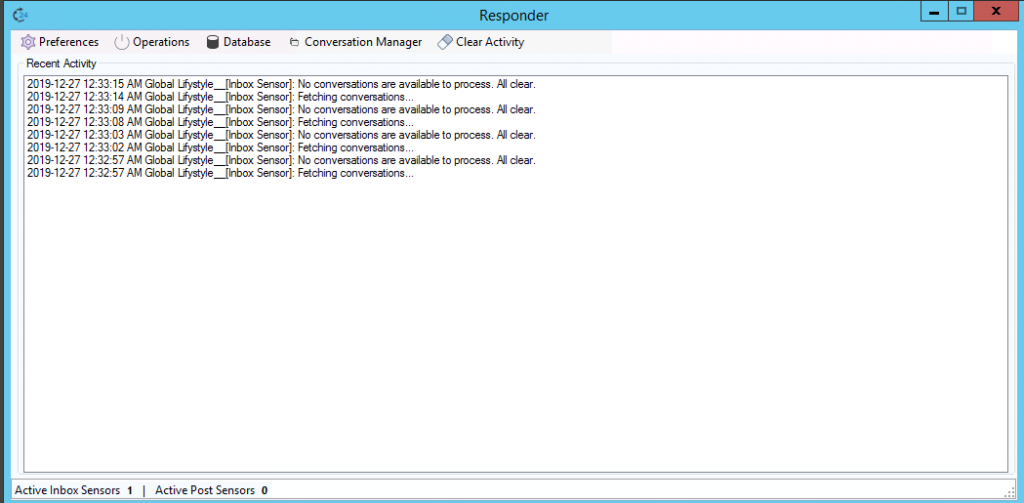
At this point, the inbox sensor is ready and can be activated from Responder tool main screen, Operations -> Activate Sensors
Summary
The article explained how to create multiple rules that enables an inbox sensor to be more dynamic by responding to incoming messages with dynamic messages based on message content. Inbox sensor can be enabled with one or more rules.