Post Publisher provide feature for publishing on Facebook Groups, Pages and Profiles. In order to publish on Facebook, you will need to create a publishing campaign, This article provide instructions on how create a new campaign.
Before creating a new campaign, you will need to create a post template if you haven’t created a one before
Open Post Publisher from main screen, from top menu select Campaign -> New. A new campaign wizard will appear.
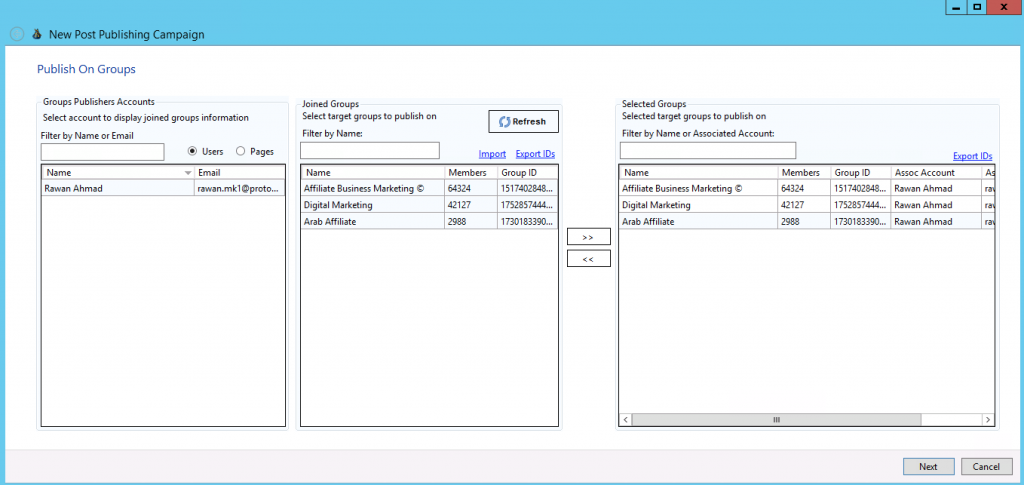
Publishing on Facebook Groups
Select an account from left table then click Refresh to display joined groups.
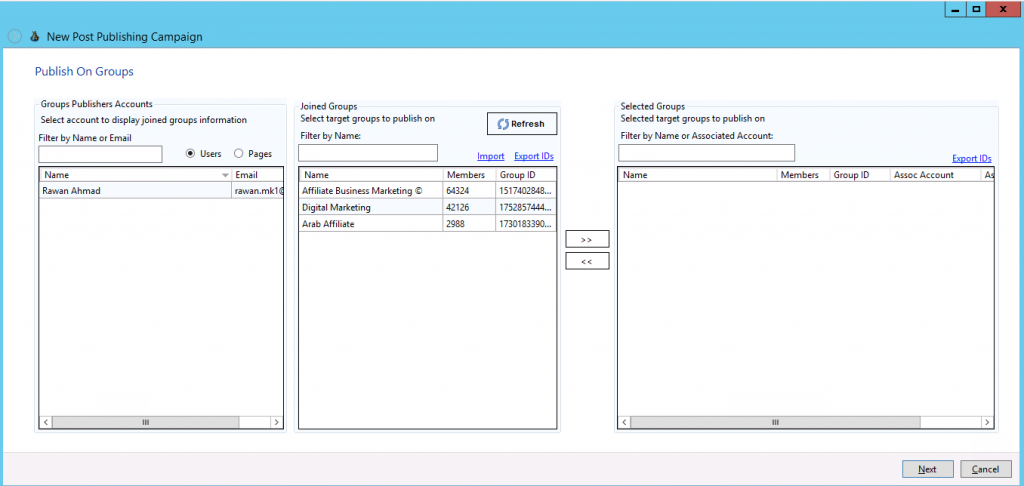
To publish on Facebook groups, select target groups by clicking on >> sign. After selecting target Facebook groups, click Next to continue to next settings page.
Publishing on Facebook Pages
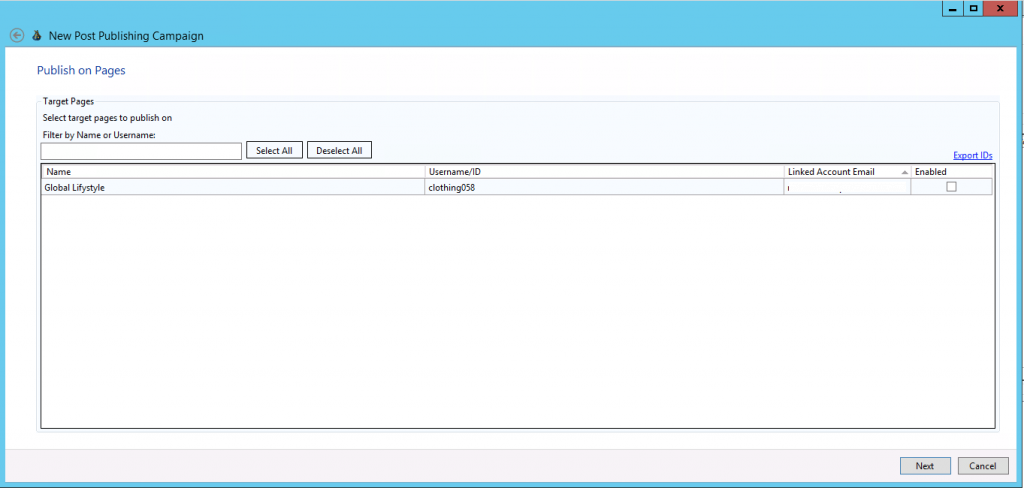
To publish on your Facebook pages, check target pages and click Next to continue to next settings page.
Publishing on Facebook Personal Accounts
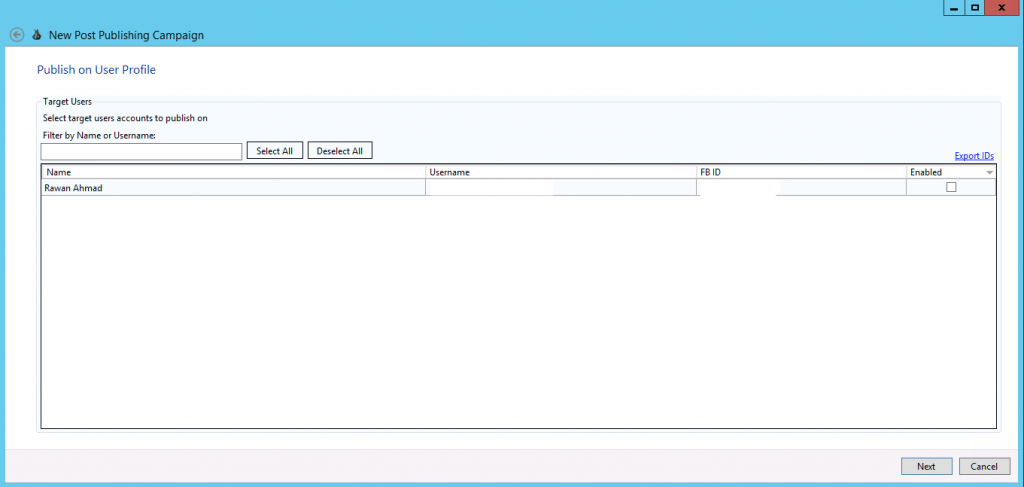
To publish on your Facebook personal accounts, check target profiles and click Next to continue to next settings page.
Selecting Posts to be Published
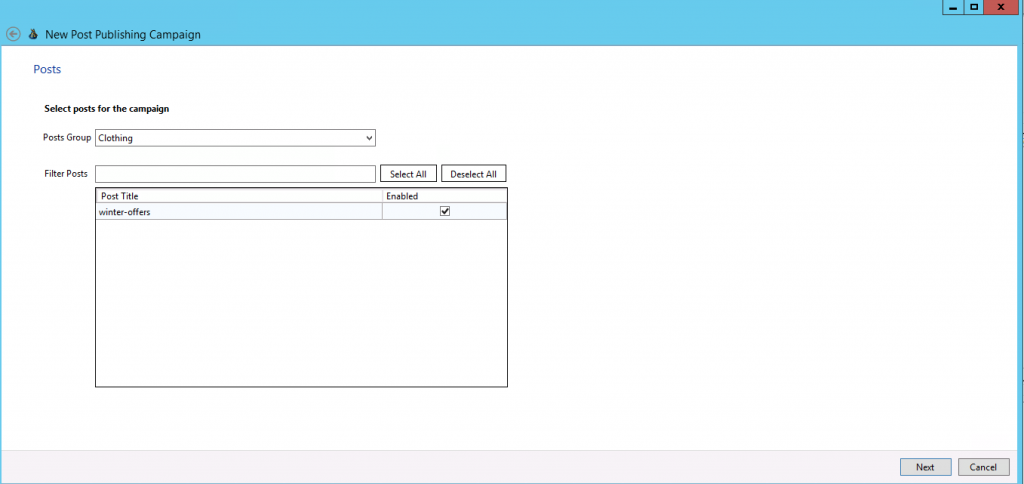
From this page, you can select what posts to publish. Posts can be created in posts manager tool. If you select more than one post, then the publisher will pick and publish random post each time.
Campaign Basic Settings
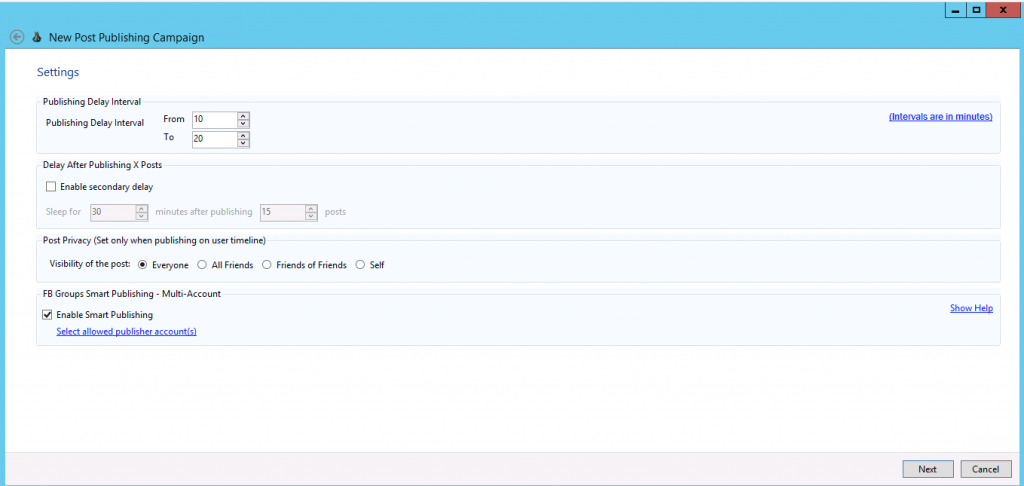
From this page, you can configure campaign basic settings such as delay between publishing tasks.
- Publishing Delay Interval: A delay range, the software will pause a random delay value before publishing next post in queue. If you’re going to publish on too many groups using a single account, it’s highly recommended to use a higher delay range.
- Delay After Publishing X Posts: Enable this option if you would like to put a repeated delay after publishing X posts
- Post Privacy: Select post privacy if you’re going to publish on user profiles.
- Enable Smart Publishing: The smart publishing feature is designed to increase the safety of your Facebook account(s). Enabling this feature will let Post Publisher verify the selected accounts posting permissions and distribute the publishing tasks fairly among on accounts. Read more
Click next button to continue to next settings page.
Campaign Advanced Settings
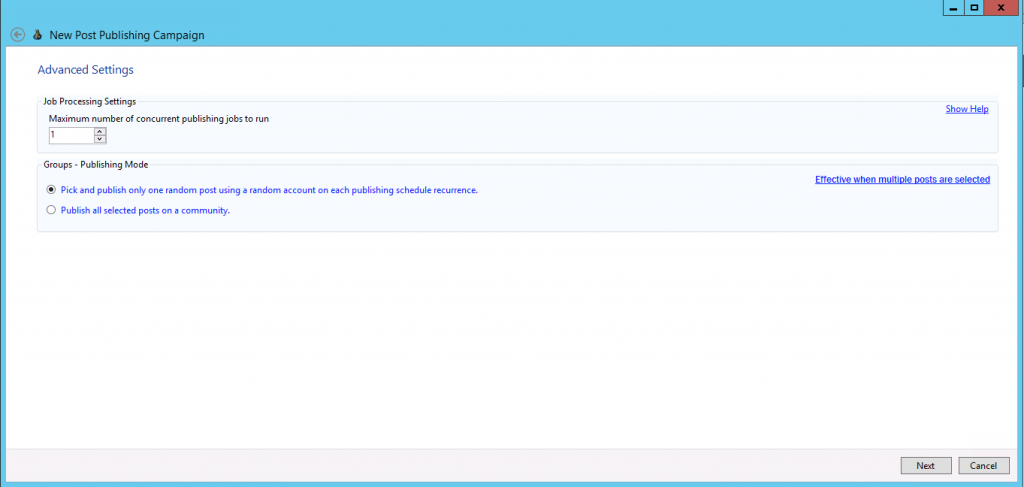
The advanced settings are critical section, setting wrong values can affect the safety of your Facebook accounts, If you’re not sure about this settings, you can safely press Next.
Maximum number of concurrent publishing jobs to run: This option allows you to specify how many publishing tasks to perform at the same time. Example: changing the value to 2: will allow the publisher to publish 2 posts at the same time.
Facebook Groups – Publishing Mode:
- Pick and publish only one random post using a random account on each publishing schedule: This means, the publisher will publish a random post on each Facebook group using a random Facebook account. This option is the default option. Example: No. of Selected Posts: 2 | No. of selected groups: 2 . Only 1 randomly selected post will be published on each Facebook groups.
- Publish all selected posts on a community: This will tell the publisher to publish all the selected posts on each Facebook groups. Example: No. of Selected Posts: 2 | No. of selected groups: 2 . The 2 posts will be published on each Facebook group.
Campaign Additional Settings (Optional)

From this page, you can enable options to let Post Publisher to send published posts information to other FoxMaster tools such as MAX Responder and Post Booster.
To be able to enable Post Sensor and Post Bump features, you will need to have a pre-defined campaign in MAX Responder tool, because post sensors and post bumping features are managed by MAX Responder.
Integrating with MAX Responder – Post Sensor
To create a post sensor in MAX Responder for published posts, check the option “Create sensor for published posts in MAX Responder” and select target MAX Responder campaign and the desired post sensor ruleset. When a post is published, post information will be added into selected MAX Responder campaign.
Integrating with MAX Responder – Auto Post Bumper
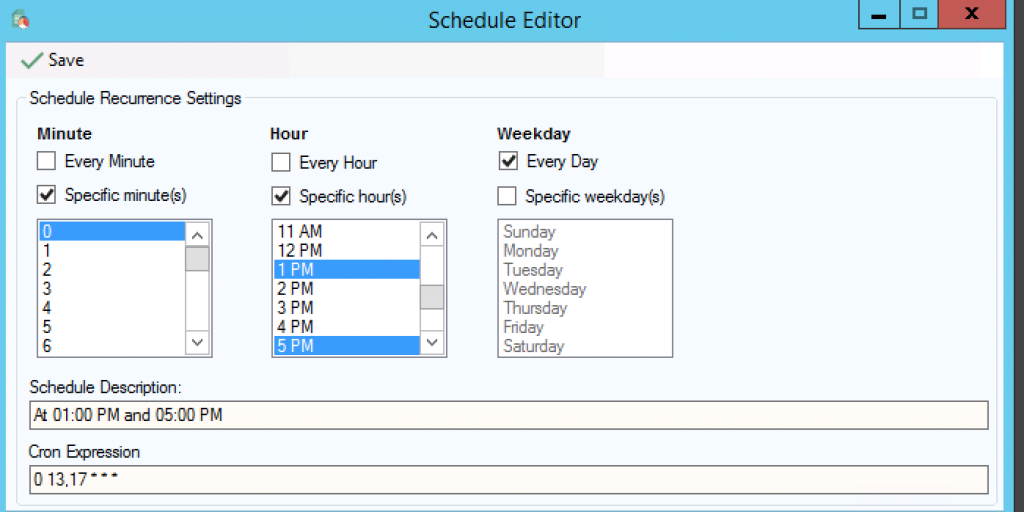
The Post bump feature can be used when publishing on Facebook groups, when a post is bumped it will be placed at the top of group feed, which means more group members will be able to see your post. Check the option “Enable Auto Bump for Published Posts” and click “Auto Bump Settings” to configure bump settings.
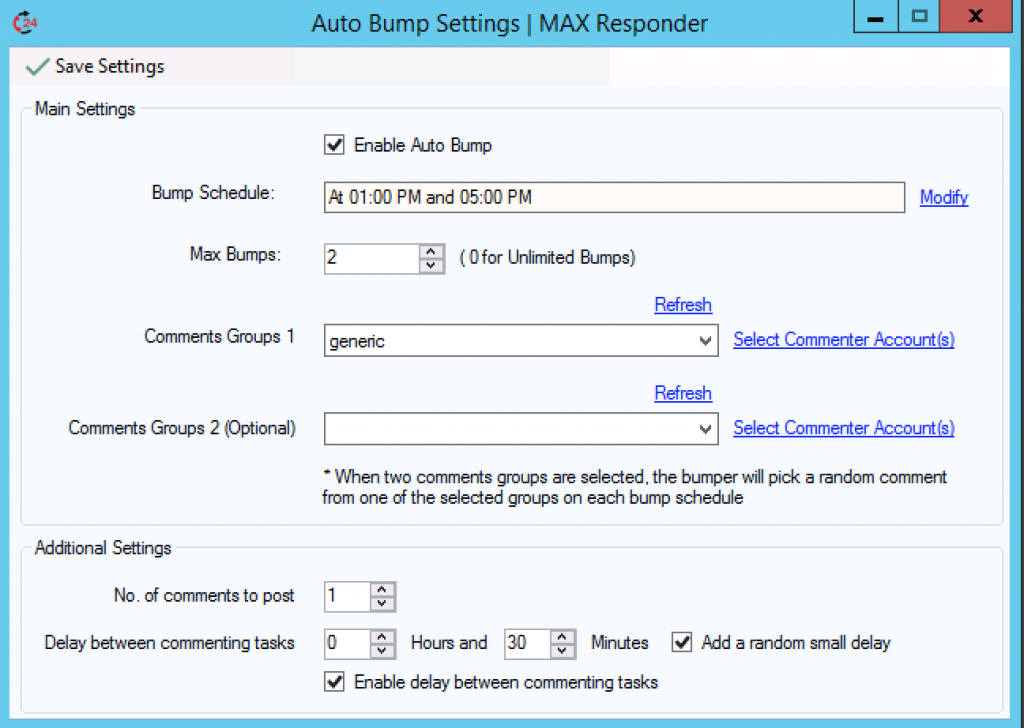
Max Bumps: Specifies how many times to bump a post
Comments Group 1 & Comments Group 2: Specify which comments group to be used, a random comment will be picked from this group every bump schedule.
Select Commenter Account(s): Specify what Facebook accounts should be used for posting comments. Random account will be used to post a comment on each bump schedule.
When two comments groups are selected, the bumper will pick a random comment from one of the selected groups on each bump schedule.
Example:
Comments Group 1 Contains: Comment-A
Comments Group 2 Contains: Comment-B
Selected Accounts for Comments Group 1: Account-A
Selected Accounts for Comments Group 2: Account-B
When a post bump schedule occurs, this is what happens:
1. Select a random comments group => Comments Group 2
2. Pick a random comment from selected comments group => Comment-B
3. Pick a random account from Commenter Accounts 2 => Account-B
That’s a lot of randomization, as you can see you can customize the bumper for extra randomization.
No. of Comments to Post: Specifics how many comments to post in a single bump, the default is 1 comment per bump.
Delay Between Commenting Tasks: This can be effective when the value “No. Of Comments To Post” is greater than 1. Allows you to set a delay between commenting tasks.
Add Random Small Delay: For extra randomization, you can check this option to add a random small delay above the primary delay value.
Enable delay between commenting tasks: Check this option to enable the delay feature
Integrating with Post Booster – People Mentioning
The Post Booster tool provide features for mentioning people in post comments. It can mention people from multiple sources:
- Mention last X facebook group members
- Mention friends
- Mention people who commented on last X Group or page posts.
- Mention people from account or page inbox
- Mention Custom audience (Pre-defined Facebook user IDs list)
To be able to enable People Mentioning feature, you will need to have a pre-defined campaign in Post Booster tool, because people mentioning features are managed by Post Booster.
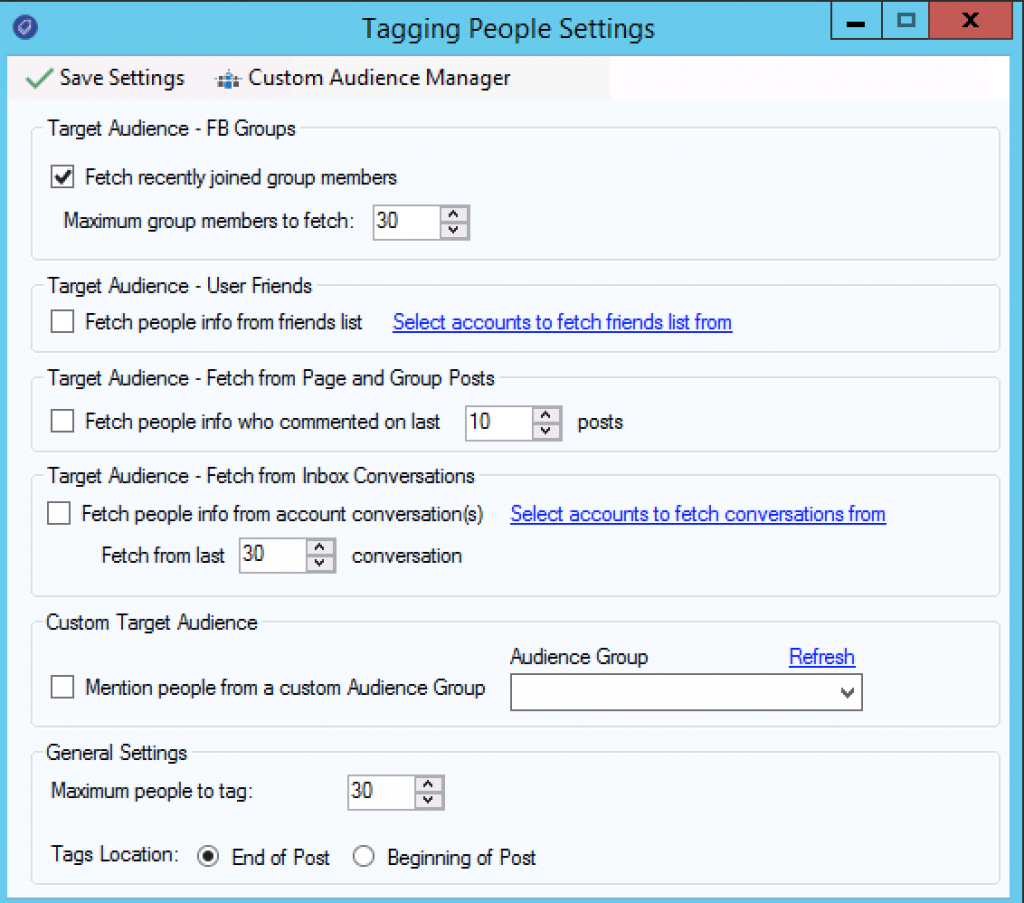
When a post is published, post information will be added into selected Post Booster campaign. To enable mentioning feature, check the option “Send published post(s) information to Post Booster” and click the button “People Mentioning Settings” to configure the mention feature.

Target Audience to Mention:
- Target Audience – FB Groups: If a post is posted to a Facebook group, you can use this options to fetch last X Facebook group member to be used as a target audience.
- Target Audience – User Friends: This options allows you to to fetch friends list from selected Facebook accounts to be used as a target audience.
- Target Audience – Fetch from Page and Group Posts: This options allows you to extract users information from Facebook page or group posts to be used as a target audience. If your post was published on a Facebook group, then posts will fetched from the group, same if posted on a page.
- Target Audience – Fetch from Inbox Conversations: This options allows you to extract users information from selected Facebook accounts inbox to be used as a target audience.
- Custom Target Audience: Use a pre-defined audience as a target audience. You can define a custom audience from Audience Manager tool.
General Settings:
- Maximum People to mention: Mentioning limit, specify the total number of people to mention.
- Mentions per a single comment: Specify how many people to mention in a single comment.
- Use custom comment list: Enable this option if you would like to add a custom message/photo along with the mentions. Random comment will be picked from selected comments group on each mentioning job. You can create custom comments from Comments Manager tool.
- Delay between comments: Set a delay between commenting tasks.
When selecting multiple accounts to post comments, a random account will be picked to post a comment.
Tagging People in a Post
You can tag people in a post by checking the option “Tag people in post”. Tagging options can be set by pressing “People Mention Settings”
Campaign Info & Schedule Settings
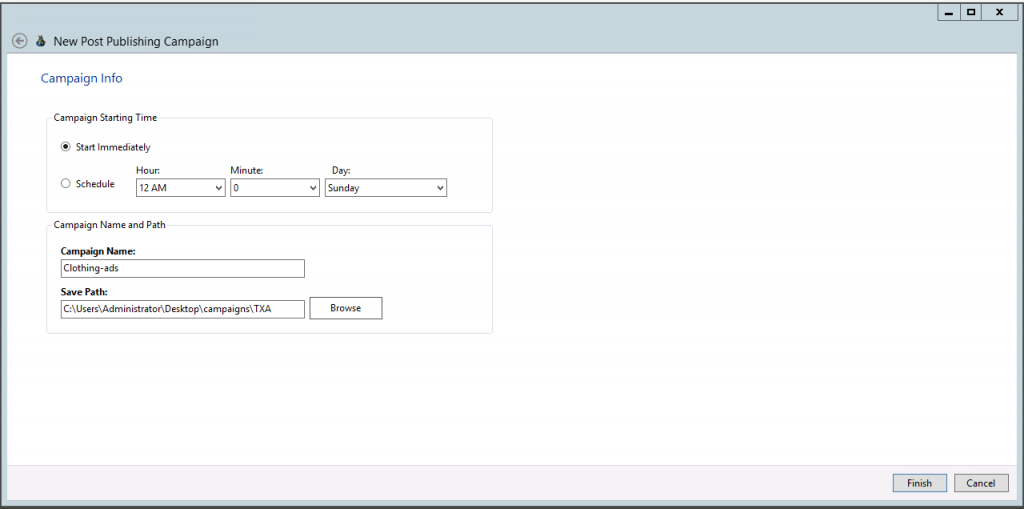
From this page you can configure campaign set a schedule to start the campaign later or you can select “Start Immediately” to start the campaign manually.
Enter a name for the campaign and select where to save the campaign files and hit Finish to save the campaign.
Starting the campaign
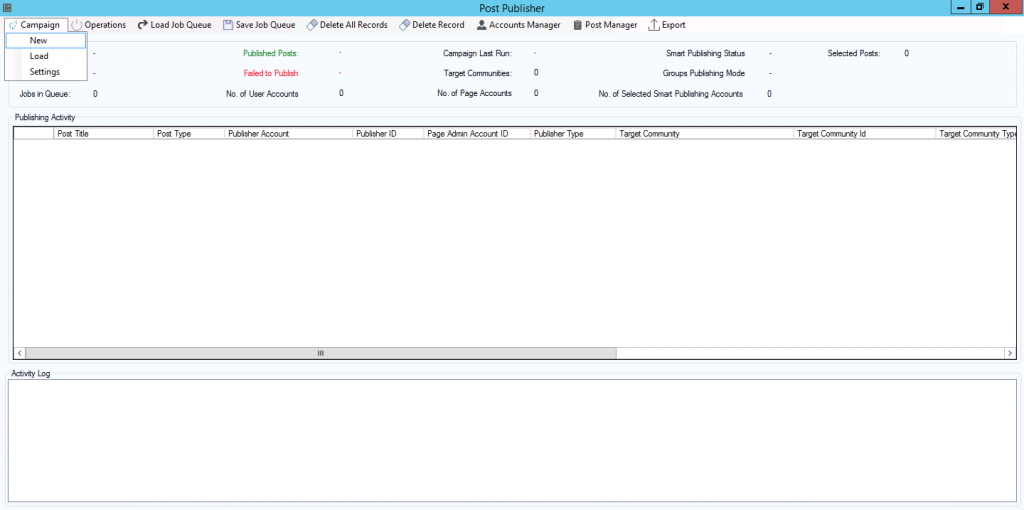
After saving/loading your campaign, you can start the publisher by pressing Operations -> Start from top menu. When campaign is started, publishing tasks will be created and queued for publishing. The following picture shows a completed campaign.
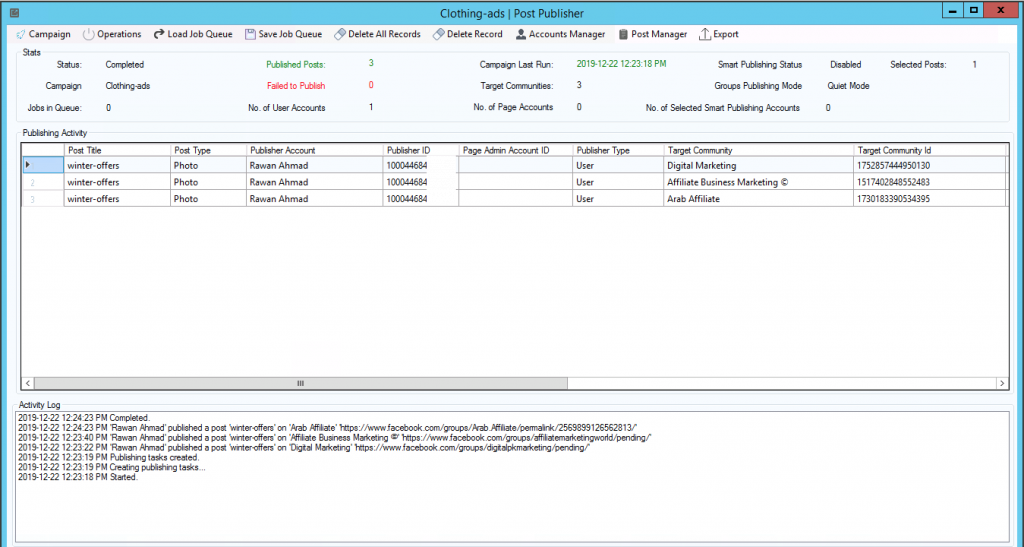
You can see what is happening at realtime by watching log messages in Activity log box.